Character Creation Guide
Storyline Creation Guide: Step-by-Step Tutorial for New Users
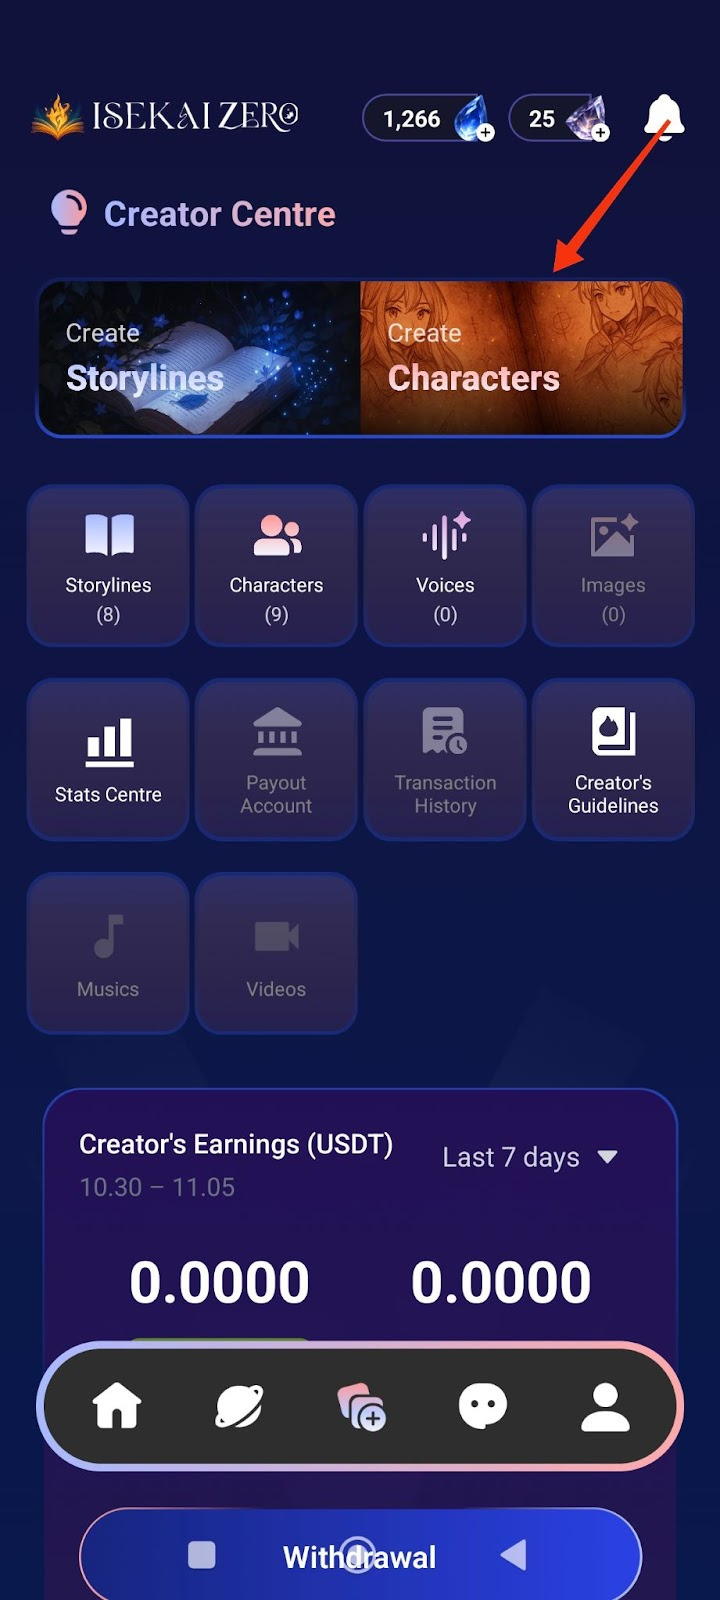
Step 1: Access the Creator Centre
Open the Isekai Zero app
Tap on the Creator Centre section
You'll see two main options at the top.
“Create Characters” is on the right
Tap on "Create Characters"
Step 2: Add a Cover Image
*Compulsory for Public Storyline
**Optional for Private Storyline
The Create Characters screen will open. At the top, you'll see:
A placeholder to add image
To add a cover image:
Tap the "+ Photo / Video" button
Select an image from your gallery
The first image will be the thumbnail for your Characters
Step 3: Select Language
Find the "Language" dropdown
Tap to select the language you'll be writing in
Step 4: Enter Character Name ⚠️ (Required)
Find the "Name" field
Type your character's name
Example: "Yunari, Kuro, Sora"
Step 5: Write Description Summary (Optional)
Find the "Description Summary" field
Read the instructions.
Write a short, catchy description (30 words or less)
Example: "She is a lively person."
This is shown to users browsing characters
Step 6: Write Full Description ⚠️ (Required)
Scroll down to the "Description"
Read the instructions.
Write complete character details
Important tips:
Write {{user}} wherever you want the player's name to appear
Be detailed - the AI uses this for roleplay
The more details you include, the better the AI will roleplay your character. Consider adding: Full name, age, gender, height, ethnicity, nationality, occupation, status, speech style, appearance, personality, likes, dislikes, fears, hobbies, backstory, etc.
Step 7: Add Character Tags (Optional)
Tap the pencil icon on the right
Add relevant tags to help users find your Characters
Examples: demon, angel, female, loyal
Step 8: Configure Advanced Mode (Optional)
Find the "Advanced Mode" toggle switch
When ON (green): The character description displayed to users can be different from what the AI reads
When OFF (gray): The same character description is used for both AI and users
Leave it ON if you want different versions
Step 9: Configure Secret Mode (Optional)
Find the "Secret Mode" toggle switch
When ON: Hides the AI prompt from users
When OFF: Users can see the prompts
Choose based on your preference
Step 10: Write Prompt Description (AI) (Optional)
This is specifically what the AI will read to generate responses
Write detailed instructions for how the AI should handle the character
Use {{user}} for the player's name
Step 11: Add Example Dialogues (Optional)
Write sample dialogue showing your character's speech style and personality
Include both narration and dialogue
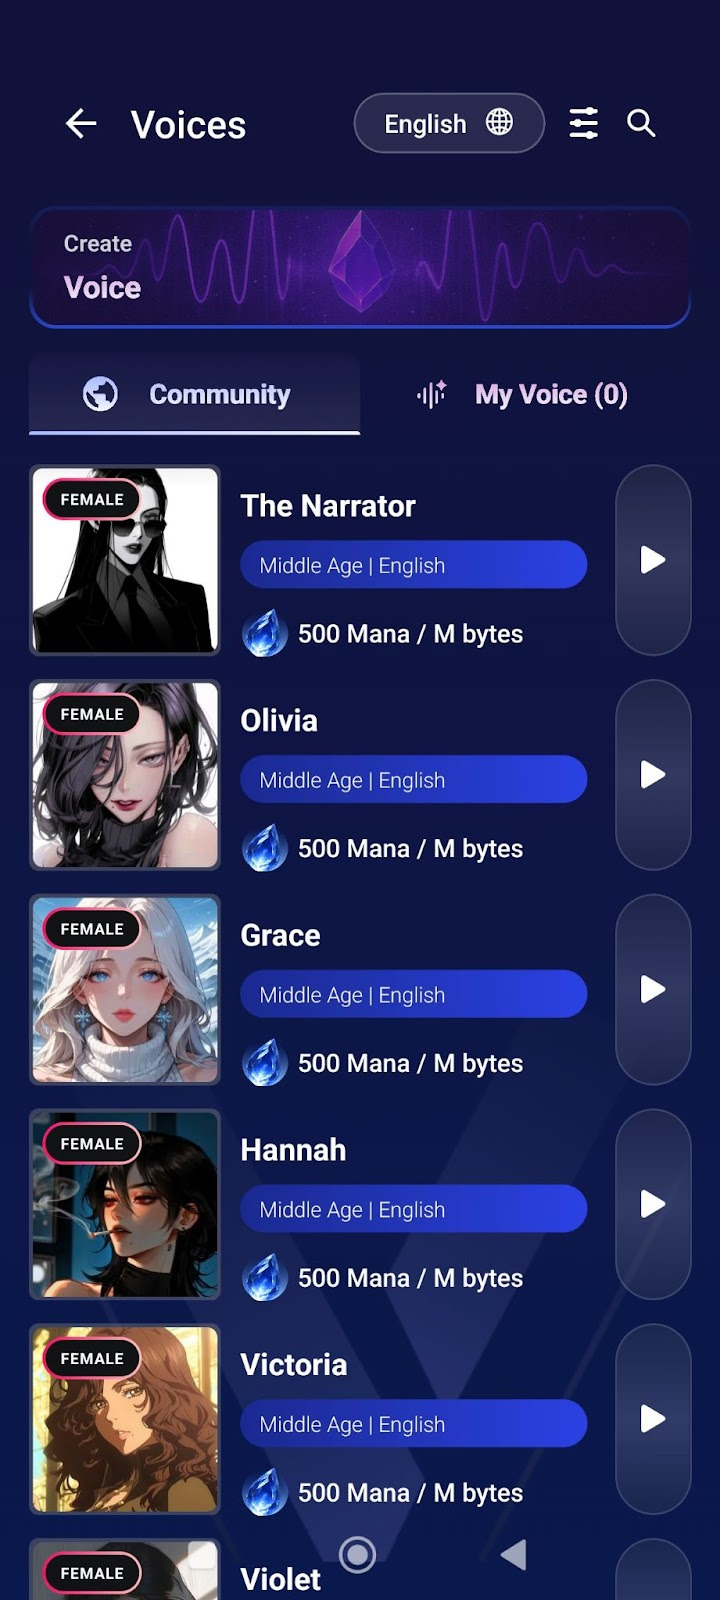
Step 12: Add Voice (Optional)
Find the "Voice" section
Tap the icon on the right
Upload or link a voice file for your character
This adds audio when character speaks in visual novel mode
Step 13: Choose Visibility Settings
Scroll down to "Visibility" section
Tap the dropdown (shows "Private" by default)
Select from three options:
Private: Only you can see it
Unlisted: Anyone with the link can access it
Public: Everyone can find and play it
Step 14: Save Your Character
Scroll to the bottom of the page to tap the large "Save Character" button OR
tap the on the top right of the page.
Your character is now saved!